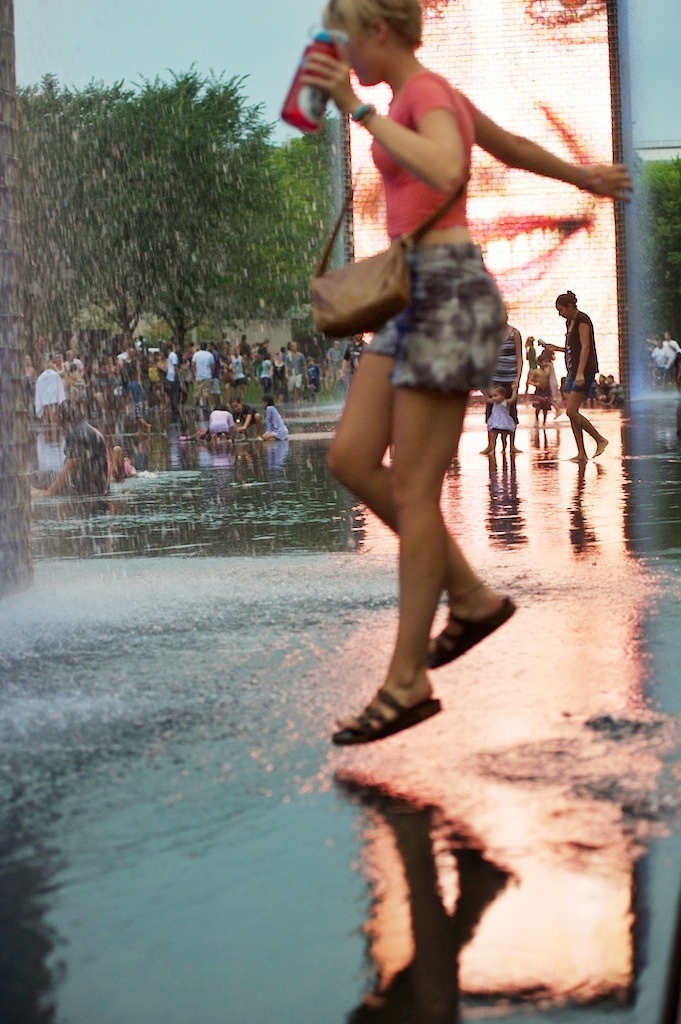
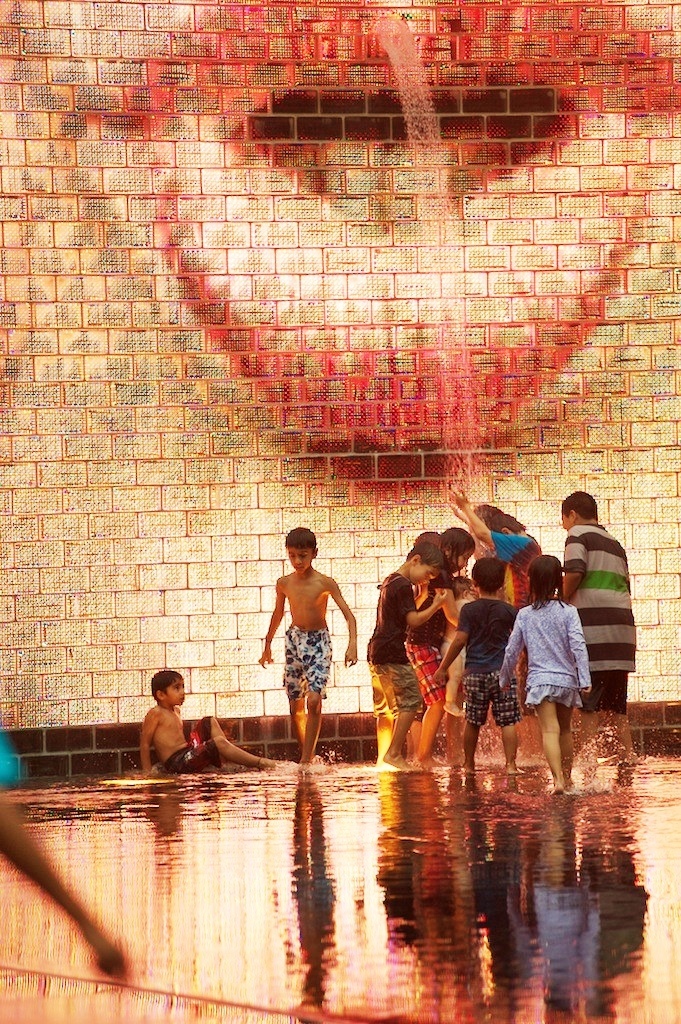
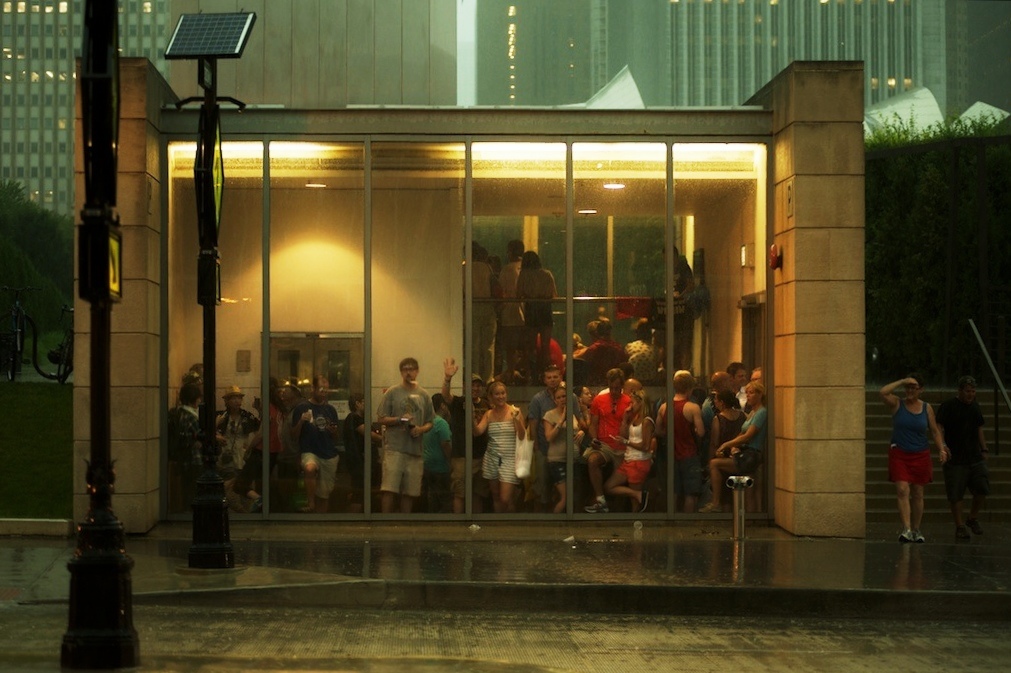
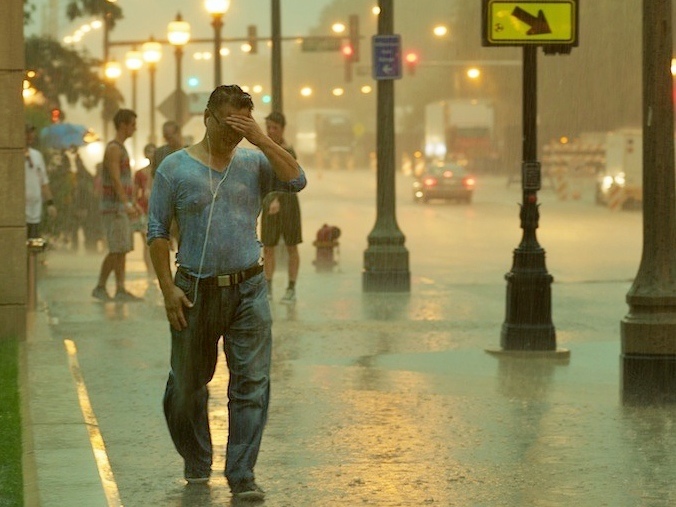
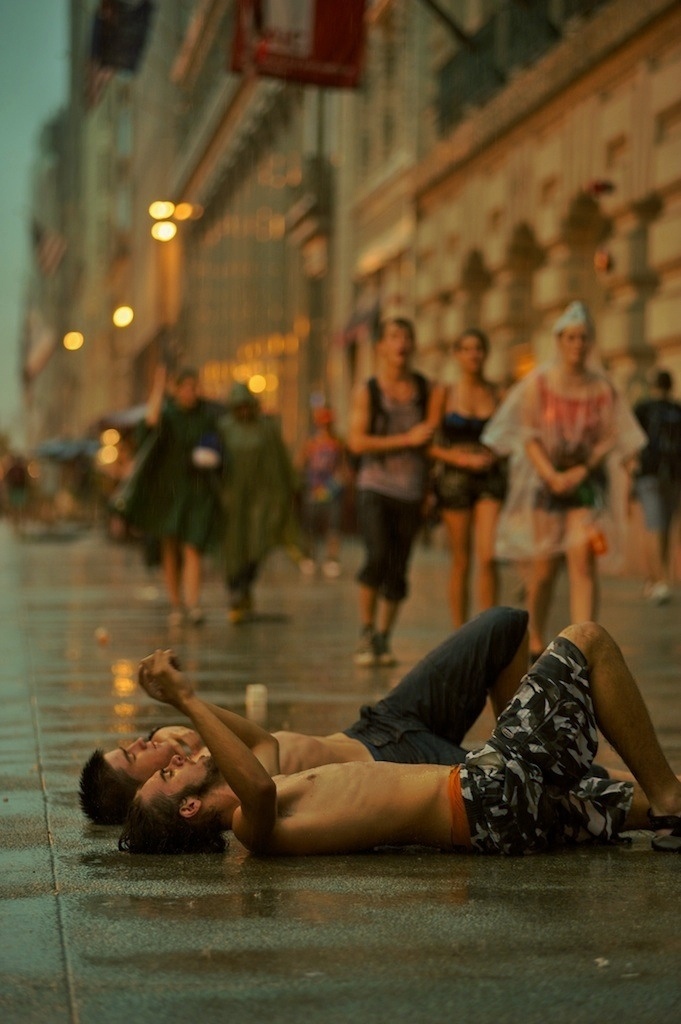
Chicago has, like the rest of the country, been in a drought all summer. Some heavy rain decided to show up once about a hundred thousand people were all packed into Chicago’s Grant Park for the mega-music festival, Lollapalooza. Officials decided to evacuate the whole deal until the storm passed. This turned out to be a really good idea. It was a pounder of a storm with lightning striking all around the area. The evacuees seemed to take the whole thing in stride, with some huddling under any available shelter, and others splashing in puddles like kids. The weather made for some great photographic opportunities too. Here are a few of the shots I took.
Some things in life make you feel like you have won the lottery. In my case, the chance to visit a colony of Emperor Penguins in Antarctica gave me just that feeling. I was in Antarctica to guide a group to the Geographic South Pole for a great company called Polar Explorers. We chartered a flight to the penguin colony for some of our group and I was fortunate to get the chance to escort the group for the day.
Some of the group in front of the Basler BT-67
We flew a few hours from the Union Glacier base camp in a ski-equiped, Basler BT-67 to a location on the sea ice on Gould Bay, about a mile from the colony. We landed between a couple of huge icebergs frozen into the ice.
Walking to the penguins from the landing spot
We hoofed it for the mile over to the spot where the penguins were gathered. What a sight! From a distance, you would swear there were a bunch of people shuffling around. We tried to keep a distance of 5 meters from the penguins, but they were so curious, they would waddle right up to you.
Fuzzy gang of penguin chicks
We weren’t required to run away from them, but could not approach them. They have no land predators in Antarctica, so the penguins did not view us as any kind of threat.
Hard to believe how unafraid the penguins are
I have to say the penguin chicks are just about the cutest thing you can imagine. It was all you could do to resist stuffing a few into your camera bag to take home.
The smallest chick I saw– about the size of a grapefruit
The chicks were about the size of an overinflated football, or maybe a bit longer, and they travelled around in these little gangs of grey down that made me giggle like an idiot.
Penguin chicks showing off
The penguins would wander alone or in groups from one cluster of penguins to another
Some penguins waddle, some slide
The adults were about waist height and very regal. They would alternate between waddling along and sliding on their bellies.
Two adult Emperor penguins and one chick
The sliding looked a lot more efficient to me, but I suppose they can see a bit farther when standing and it is probably warmer not laying on the ice. The sound of the colony was a cacophony of honks and chirps. I made a short audio recording of the penguins. Listen to it here:
The penguins' feet look almost reptilian
Closeup adult Emperor Penguin
Acouple Emperor Penguin chicks about the size of a football
I brought a few lenses with me to shoot the penguin colony, but I ended up shooting almost everything with a Nikon 70-210mm f/4–5.6 on a D700. I recorded the audio with a Roland Edirol R-09HR digital recorderI think if I could do it again, I would have 2 bodies (full frame sensor) with a 300mm f/2.8 on one and a 24–70mm f/2.8 on the other. I would bring a 1 and 2 stop neutral density filter for each or a variable neutral density filter so I could get 3 stops wider open in the bright sun. A flash would have been great, but I am afraid it would be too disruptive/stressful for the penguins. If I was going to be there for a couple of days, I would bring a body that could shoot video also and a tripod with a fluid head. I would also add a shogun mike to my Roland recorder.
My camera kit was necessarily light for this trip, since it was not a photography trip, but rather a ski trip. We were to be skiing with our camping gear in sleds pulled behind us on our approach to the geographic South Pole, so camera equipment with its weight and volume was something of a luxury item. As the guide for the trip, I had to (rightfully) put the team and its needs in front of any desires I had to make photographs. Therefore, I only brought a Nikon D700 body, three lenses (20mm, 50mm, 70–210mm), and a Canon G10 point and shoot for basic video and pocketable convenience. The lens selection was pretty good overall, but I really didn’t use the 20mm with the penguins and I didn’t use the 70–210mm for the ski trip. For a trip where I had to travel light and cover a range of situations, this kit suited me well.
The centennial anniversary of Roald Amundsen and his team reaching the Geographic South Pole on December 14, 1911 was celebrated last week with people from all corners of the Earth in attendance. Toasting a great accomplishment for Norway and humanity, the Norwegian Prime Minister, Jens Stoltenberg, Explorer, Børge Ousland and officials from the Norwegian Polar Institute and the NSF each addressed the crowd. At – 35° C, fingers were cold holding the camera.
Antarctica is as photogenic as it is inhospitable to human life. The effort required to get there is easily paid back in memories.
Nobody likes a good fight more than a photographer. Almost any topic regarding photography will raise the the hackles of a shutterbugs. Just go tell a Nikon shooter that Canon makes a better system, or suggest to a group of photographers that a real photographer only uses natural light and never crops an image (be prepared to run for cover). Fighting tendencies notwithstanding, for some reason, I am surprised about how up in arms some folks get about HDR photography.
HDR stands for “high dynamic range” and is a technique for producing an image that captures a range of light values in an image wider than would normally be possible in a single image. A series of photographs are shot with only the exposure changed in each one—exposing for the highest highlights at one end of the exposure range and the darkest shadows at the other end. The images are composited using software and the result is an image that shows dark shadows and bright highlights at the same time.
Unlike the eye, the camera is, and has always been, limited to a relatively small dynamic range of exposure. Overcoming that limitation has been one of the fundamental challenges to photographers. It has previously been necessary to decide if you wanted to maintain detail in the highlights or shadows in an image. The ability to overcome that limitation or to exploit it has defined the careers of thousands of photographers since the first light hit emulsion so long ago.
The super incredible human eye can see and process a much wider range of light to dark than a camera can. While HDR images can simulate our eye’s dynamic range, it doesn’t duplicate it. There is something that happens neurologically that interprets what we see in in everyday life in a way that (obviously) makes perfect sense, i.e. It looks “real.” Somehow, the HDR image often seems “unreal” as if the mind can’t recognize a photograph with a wide dynamic range the way it does with real scenes.
Now that we have the ability to create an image with a wider exposure range, it makes sense that that would be the superior photographic technique. But there is something hard to define about a “normal” photo that often makes it seem more comfortable and natural to look at than a HDR photo. Digital photography is still held up to film photography for comparison, with current digital technology arguably meeting or exceeding film quality. “Traditional” digital photography vs. HDR photography could be compared to the visual difference between a movie shot on film and one shot in HD. The movie shot in HD sometimes has a hyperreal look to it that the film doesn’t have. If digital photography has strived to simulate the analogue look of film, then HDR images could be seen as a step backwards in photographic evolution. There is no denying that HDR images can be visually arresting. Perhaps the very fact that they do not look a film image earns them a label of non-photographic. This is, in my opinion, ridiculous.
To claim that HDR images lack merit because they look different or they use a different technique for their creation, can be compared to movements in painting. The realist movement criticized the impressionist movement. Many put realism as a style on a pedestal as beyond reproach. The impressionists’ paintings were brash and unorthodox, appearing to have a lack of skill or control as defined by a desire for a painterly look that imitates reality rather than interpreting it. The impressionist paintings did not appear to be “real” paintings because they were not “realistic.” Similarly, HDR images are often seen as not being “real” photographs. Of course, no photograph is anything more than the photographer’s interpretation of a fractional slice of time captured by the camera. The position and angle of the camera, the choice of lens, aperture and shutter speed, and the decision of when to release the shutter all put the fingerprint of the photographer on the photograph and define the image as an interpretation of reality rather than a copy of reality. The impressionists captured a view of the world unique to each artist that has come to be accepted and celebrated as brilliant in its own right. I have no doubt that HDR photography will one day similarly be seen as an important movement in the history of photography.
I am the first to admit that there is a lot of bad HDR photography being made. But there is certainly a lot more bad “traditional” photography being made at the same time. I think it is important to hang up the boxing gloves on the subject and recognize HDR photography for what it is—a means of self expression for photographers to share their vision with others. Not better, not worse, just different. I mean, it’s not like we are comparing the obviously superior Nikon to Canon.
Fireworks are a once-a-year event for most people that provide an exciting photo opportunity. They are not too hard to capture if you keep a few things in mind. This information is most useful for SLR or DSLR users, but much of it will apply to point and shoot cameras also.
1. Use a tripod. You can photograph fireworks without one, but the results will be more like artistic light trails than recognizable as fireworks.
2. Use a remote shutter release. You are going to want to use the “Bulb” setting on your camera, and it is a lot easier with a wired or wireless shutter release.
3. Put your camera in “Manual” mode. You don’t want your camera to make adjustments to your settings without your input.
4. Set the shutter speed to “Bulb.” This will give you the most control over your shots. You will use the above mentioned remote shutter release to open and close the shutter.
5. Set your aperture somewhere in the middle of the lens’ range around f/8.
6. Put your camera’s focus setting on manual and focus your camera to infinity.
7. Set your ISO to 100 or 200. Fireworks are really bright!
8. Arrive early enough to get a good unobstructed view. Set up you tripod and camera and roughly frame your shot. You can make adjustments after the fireworks start to fly. Consider including foreground elements that make interesting silhouettes or water for beautiful reflections.
9. When the fireworks launch, give it a moment or two to get up in the air, then release the shutter. Hold down the remote shutter release until the firework has faded and close the shutter ( let go of the shutter release button). It may take a few fireworks to work out the timing, but you will see it is pretty easy. Check your image on the LCD to see if you like the framing. If it looks good, fire away.
10. Remember that the fireworks are a family event and kids will be everywhere, so try to set up where your tripod won’t be in the way of others. This is meant to be fun for everyone, so be courteous to those around you and have a great time.
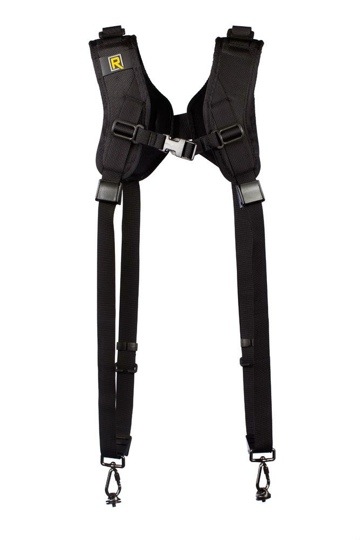
It may seem hard to imagine that you could get excited about a camera strap. Not long ago, I would have agreed with you. Now, all of that has changed. If you haven’t heard of Blackrapid, listen up.
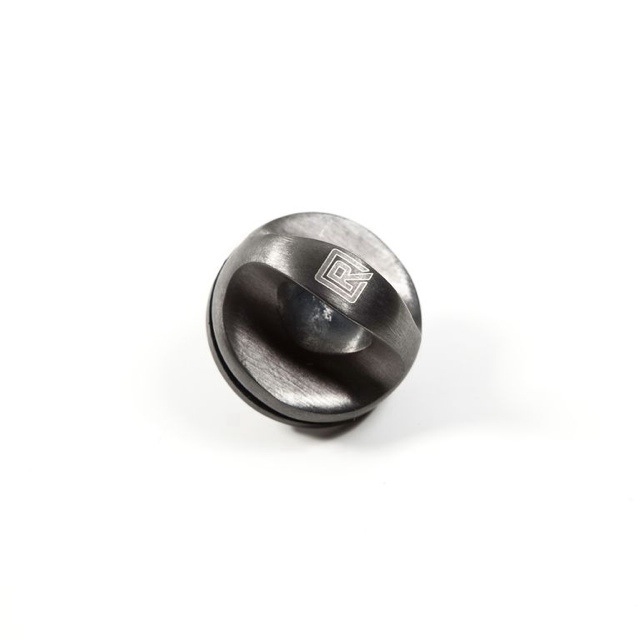
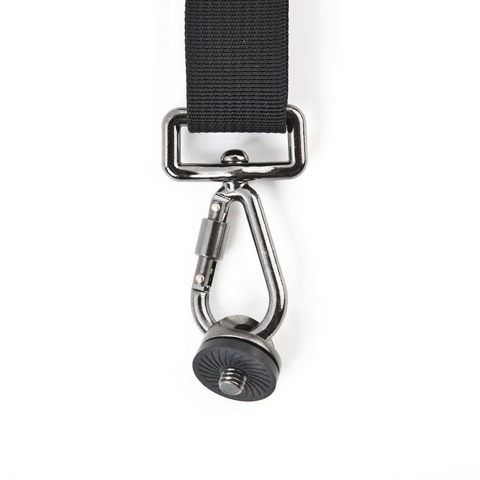
The Blackrapid camera straps come in a few different styles that all work on the same principle. The camera slides along the strap on a heavy-duty, steel swivel snap that clips onto a burly steel eyelet screwed into the tripod socket (of the camera or a long lens mount). The eyelet is backed by a rubber gasket that compresses against the camera body and makes it very unlikely that it would accidentally come unscrewed. Blackrapid recommends moistening the gasket before attaching it to the camera to get an even more snug fit.
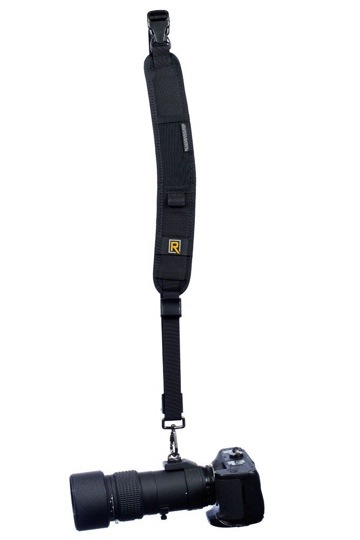
Instead of the camera resting against your stomach or ribs, the strap is slung across the body, like a messenger bag and the camera hangs at your hip. The double strap has loops that hang beneath each arm and connect at the shoulder pads. To shoot, you just drop your hand to your side, and the camera is right there. Slide the camera up in front of your eye and shoot away.
If the strap rotates around your body when you lift the camera, an ingeniously simple adjustable bumper on the strap will catch on the swivel snap as you lower the camera and rotate the luxurious shoulder pad back into place. The Blackrapid site has some great videos showing how this works.
The build quality of this gear insures that it will be with you a long time and hardware failure is not an issue.
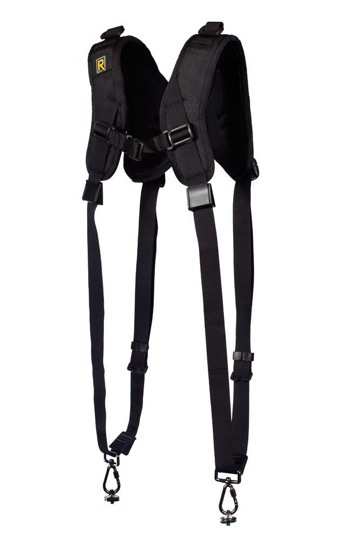
The event I shot earlier this week was 250 people for 5 hours. Lots of running around was required with the typical heavy f/2.8 lenses on pro bodies. I shot the event alone, so I didn’t have anyone to shlep gear for me. it’s tiring just talking about it. I used the Blackrapid RS DR-1 Double Strap to hang one body on each side like a pair of six-guns.
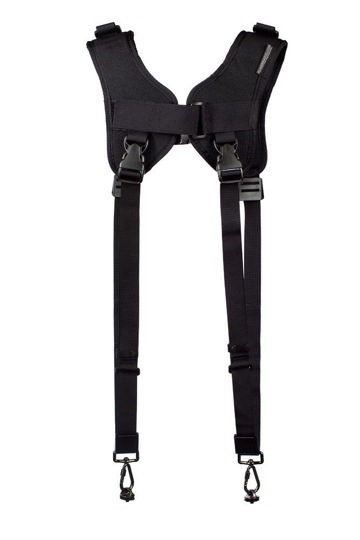
The DR-1 is essentially two of their single straps mated together (they can be separated and used as sigle straps too!). It has a strap between the shoulder blades to adjust the width, a fastex-buckeled strap across the chest and an elastic strap across the lower back to pull the cameras back and out of the way when they are not in use.
The padded shoulders are similar in feel and look to backpack straps (minus the backpack) and are comfortable for a long shoot with a lot of weight.
Wedding/event/sports photographers and photojournalists will love this rig and benefit from the speed at which cameras can be changed without constantly worrying about a strap slipping off of your shoulder in the heat of the action.
For my last event, the double strap was invaluable without the aid of an assistant. I was able to have a very smooth rhythm moving from shot-to-shot and camera-to-camera — dropping one camera at my side as I simultaneously lifted the other from the other side. The bodies and lenses were not clunking together all night and I didn’t need to carry a bag.
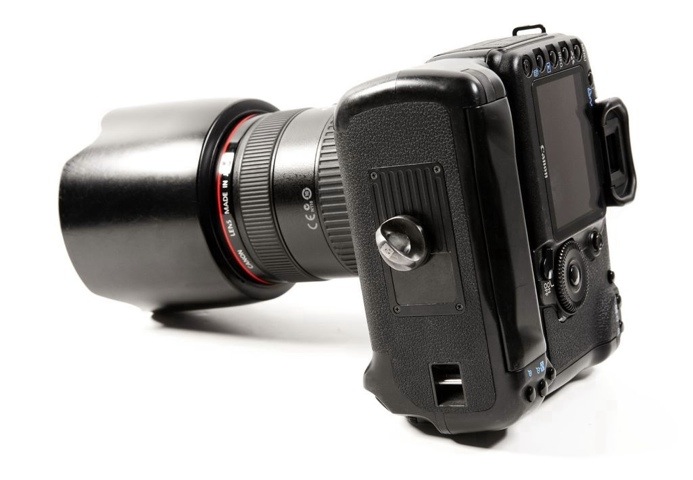
With my 80-200 lens, the strap was attached to the lens’ tripod mount. That kept the camera and lens balanced more or less horizontally. I found that configuration more comfortable than the lens hanging straight down.
For being outstanding in usefulness, ergonomics and build quality, I can recommend this product without reservations. This may be more camera strap than you will need, but it certainly won’t be less.
Check out the RS DR-1 and their other great products at www.blackrapid.com.
One of the main topics on photography message boards, letters to photo magazines, and photo podcasts revolves around what equipment is the best. Of course the latest equipment splashed around the pages of the photo mags is super sexy, but it may not be what you need. If you are just starting out as a photographer, you may be better served by using inferior/older gear. You may not want to hear that if you are hoping to get the new Superultimax 5000 to improve the quality of your photography and are looking for someone to tell you that is what you should get.
My experience in most things, including photography, is that it is beneficial to start with something simple and learn to overcome its limitations. When you focus on the process of the art rather than the equipment, you will find that you gain a more solid grasp of the fundamentals of photography instead of learning to be a D3x operator. Learning to use more complex professional equipment is light years easier if you already understand what it is that you need the camera to do. My first SLR (film) was a Nikon N5005 with a 50mm lens — no photographic powerhouse, but I was able to learn how to control every aspect of it and sell a lot of pictures using it while the other photographers I worked with were using N8008s or N90s. I was selling just as many images as they were even though my equipment was technically inferior. I purchased an inexpensive Nikon 35—105mm lens and was able to get an understanding of a range of focal lengths and still create lots of saleable images.
When I moved to digital, I got the modest Nikon D50. My knowledge gained from my film camera transferred neatly and my learning curve was a very low angle. I was able to focus on the difference between film and digital instead of learning how to operate a complex camera. I still occasionally shoot the D50 and get great results from it. After a few years with the D50, my understanding of digital photography filled out nicely and I decided it was time to move to a full-frame camera.
Over the years of using equipment that was less than the latest and greatest, I learned how to improvise and make shots work without the benefit of vibration reduction, a high frame rate, fast zoom lenses or 51 focus points. Now, when I pick up my D700, I know that all of the advanced features are icing on the cake and not necessary for me to make a great image. My foundation of photographic knowledge is solid, so that I can get the most from my equipment rather than missing shots because I am trying to program a supercomputer with a lens.
Don’t get me wrong, I made purchasing decisions for my first cameras based on my limited funds at the time and if I had been rich, I might have gotten more advanced gear from the start. My point is that the fact that I started with lower-end gear and learned how to make it work in all situations has probably made me a better photographer in the long run. Likewise, if you feel like your gear is holding you back, challenge yourself to make great images despite its limitations.
Scott providing the perimeter security from polar bears on our training trip in Svalbard
This year’s trip to the North Pole was a success, with unprecedented (for me) drift of the pack ice due north and fantastic weather between -20 and -27° C. Our training trip on the archipelago of Svalbard in Norway went off without a hitch and no polar bears were seen around camp, thanks to our 143 pound alarm system, named Scott (above). We were delayed a few days getting out on the Arctic Ocean when the runway on the ice developed a crack shortly before we were to land on it, sending our plane mercifully back to Norway rather than to Davey Jones’ locker. A few days later the runway was repaired and we made our landing at ice base Barneo near 89° north. Our ski to the Pole was beautiful and benefited from the pack ice drifting north, directly towards our goal. This would have been among my very best trips to the Pole, but I developed a respiratory infection on the first day, and felt like my sled was filled with lead and I was breathing through a straw. With the help of my incredible teammates, I still managed tot have a great time.
The Antonov-74, a Short Take-off and Landing Powerhouse a.k.a. Our Ride to the Arctic Ocean
My photography quiver on this trip was small, but adequate. I think I will tweak it next time a bit more, but I can’t complain. My main camera was a Nikon D700. This body is small enough for remote, self-contained travel, with powerhouse, pro features and a full frame sensor. The magnesium body can take a lot of abuse like a sled rolling over on top of it, but that metal sure is cold to hold at 20 below zero. I usually stick a self-adhesive body warmer (a big version of the disposable hand warmer) around the grip to keep my hand and the battery a little warmer, but the friendly folks at the TSA confiscated all of my body warmers when I was leaving O’Hare Airport in Chicago. I always bring these, but for some reason, they didn’t get through this year. My lenses included a rented 15mm f/2.8 fisheye Sigma, a Nikon 105 f/2.8 VR macro, a Nikon 20mm f/2.8, and a Nikon 70—210 f/4–5.6. I think in the future, I would bring a 14-24mm, a 50mm f/1.4, and an 85mm f/1.4. I didn’t find that I craved the reach of the longer telephoto with the sweeping panoramas that are up there. I think an 85 would do the job. The 105 wasn’t bad, but a bit big (then again, the 14-24 isn’t exactly petite). I didn’t find I had the time to do macro shots anyway. I was there as a guide and not a photographer, so I had to shoot quickly and not compromise my main job of getting to the Pole safely with the team as priority one. That conflict is a good topic for a later post. I carried my gear in my ever-faithful and ancient Lowepro Orion beltpack. This is the most simple camera bag ever, but provides great protection with low weight and a good carry. It has been my go-to shooting bag for years. I carried a Canon G10 in my pants cargo pocket in a sleeve I made from a cut up foam sleeping pad and some duct tape. The G10 is great for a second camera. For outdoor shots with good light, the image quality is super primo. Indoors, with natural light–not so much. But I was outside, and the G10 loves the low ISOs with 24 hours of sunlight each day. Plus you can shoot OK video, even though it isn’t HD. I considered a G12 for the HD video, but I think the body seems less rugged than the G10 and I know I would snap off that flip out screen climbing into a helicopter or trying to pull it out of my pocket with clumsy gloved hands. I brought 4 extra EN-EL3e batteries for the D700 , a blower and a lens pen. That is pretty much it. I did also bring the so-simple-it-seems-dumb-but-is-actually-freaking-awesome Think Tank AA battery pouch for my spare GPS batteries. Speaking of Think Tank, I brought all my camera gear, satellite phone, GPSs, cell phone, card reader, audio recorder, chargers, batteries, laptop, hard drive, cables, and an iPad in a Think Tank Airport Antidote 2.0. I have never moved so much electronic gear through airport security with so little hassle before. This is one fantastic bag. Think Tank has earned a loyal customer in me.
Mr. Huang Nubo recites a poem at the first ever North Pole Poetry Slam
We celebrated our arrival at the Pole with the first North Pole Poetry Slam. Mr Huang Nubo is a respected and accomplished poet from China and recited his poetry in Chinese. The words were not understandable to me, but listening to him, I felt like I could understand what he was saying through the tone of his voice. Our friends from Iceland brought with them the dubious gift of Icelandic schnapps and “cheese shark,” which is putrified Icelandic shark. It needs to rot in the ground for six months to become “edible.” Yes it is as bad as it sounds. They admitted later that the shark was something of an excuse to get drunk on the schnapps.
Putrified Icelandic shark, or "cheese shark"-only a (drunk) Viking could love this stuff
I needed some fresh air after the Icelandic sushi. Here is a video of the scene outside the tent.
I love to talk about photography and travel in the high(est) Arctic, so post a comment or drop me a line if you have any questions.